


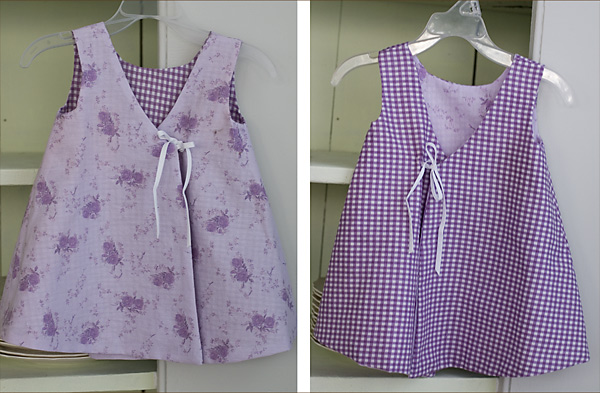
Here’s one of my two tutorials that were chosen as “Best of 2008” by Craftster.org. I know summer is almost over, but this little dress also could be made in heavier fabric and worn as a jumper.
My goal here was a dress for a friend’s daughter that 1) was reversible 2) didn’t include buttons on both sides because I thought that might be uncomfortable against baby skin 3) didn’t require binding because I stink at that.
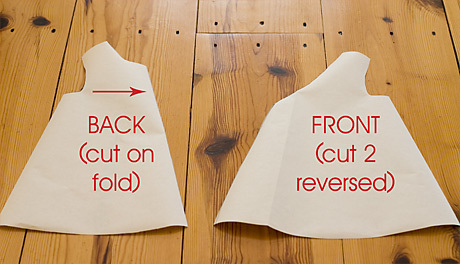
1) Start with a basic A-line dress shape. I used McCall’s 2213 and made the neck a bit rounder. I then drew a line to mark the shape of the cross-over panel. (I think you also could make the big piece the front of the dress and draw use a slightly different shape to make straps that cross over each other at the back of the dress)

2) Here’s the two pieces you should have (you’ll have to trace the back panel twice b/c you’ll ruin it when you cut the cross-over panel piece)
3) Lay the side pieces of fabric A right sides together on the back panel and sew the side seams. Do the same for your second fabric.

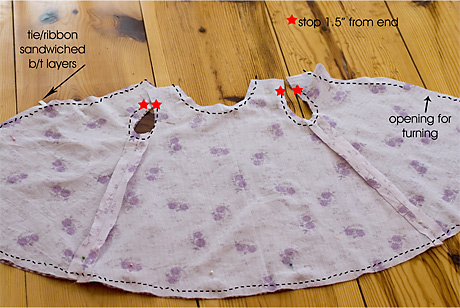
4) Lay the pieces out flat, here’s what you should have:

5) Pin the two pieces right sides together, with your ties sandwiched between the two layers on one side. Sew around the whole thing except for the top of the shoulders, stopping about 1.5 inches from the end of the shoulders where marked and leaving an opening on one side for turning later. (if you were making cris-crossed straps, I think you’d stop at the opposite edge on the two outside edges but I’m not sure)
6) Turn right side out and press. Line up the shoulder seam by folding back the outer fabric and pin the inner fabric.

7) This part is hard to describe: sew along that edge, then keep going, matching the edges of the second fabric, so you’re sewing along the other fabric as well. Basically you’re sewing the shoulder seams and then tucking them in.

8)Tuck the shoulder seams in, press and slipstitch the opening closed. Also, close up the opening you used for turning.

9) Figure out where you want the bow to end up and make two button holes, so you can thread one of the ties through to the inside and then back up to make the bow.
(I didn’t do this right for my first example so here’s another dress showing it)

I don’t have any pictures of the recipient of the purple dress, but here’s adorable Miss Bridie wearing the yellow floral/blue check version. This picture was taken about a year after I sent it to her, and as you can see, it works well as a cute little top as well as a dress. And though I originally envisioned it with the tie in the front, it’s cute either way!
