This birthday gift would’ve arrived on time, instead of being a few days late! But like I always say, why not extend the celebration a bit?
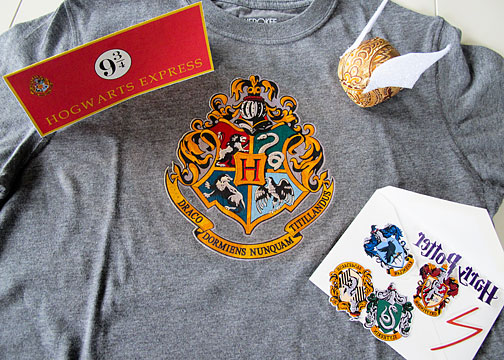
This is a collection of Harry Potter-themed items for a friend who is turning 10 today. But Parker was so enamored with everything I made that he decided he wants a Harry Potter party when he turns 9 next fall, and has spent the last few days obsessively planning. We have a Harry Potter cookbook, and he decided to type a list of all the recipes he wants to include at his party. I finally stopped him when he was at about 65 recipes 🙂
The t-shirt was the easiest part of this project, though I had some missteps. The Hogwarts crest is a design I purchased from the Silhouette online store. For my first attempt, I printed it on regular iron-on transfer paper, but you really can only use that on white fabric. It didn’t show up well at all on the gray shirt. So I bought some iron-on transfer paper for dark fabric and tried again. For some reason, my printer was acting up, and the first time I printed it, I ended up with random black boxes printed across my design. So frustrating to waste a rather expensive sheet of transfer paper! But once it actually printed correctly, it was super simple to cut it out using my Silhouette and then iron it on to the shirt. (Note: I also duplicated the image in the Silhouette software and filled it in with gray, to make a background layer. That way, the parts that don’t get cut out — like around the top of the crest — aren’t bright white, and blend into the shirt a bit more.)
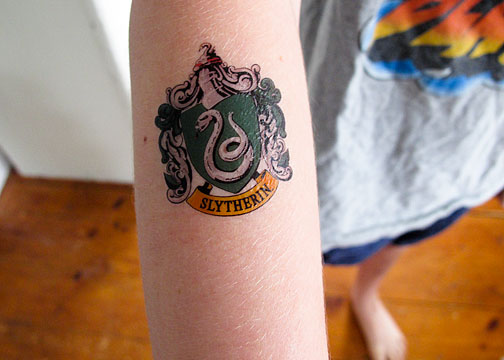
I also used my Silhouette machine and designs I purchased to make the temporary tattoos pictured in the lower right-hand corner of the picture. (They look backwards, because the images are reversed and then appear the correct way once you stick them on). My mother-in-law had given me some of the Silhouette temporary tattoo paper for Christmas, and this was my first attempt at trying it. I did have to set my blade depth one notch up from the recommended cutting settings, but that could just mean that my blade is a bit dull. (I did not purchase the thunderbolt/scar … that’s just the letter “N” stretched a bit to look more like Harry’s scar!)
I made a bunch, to fill up the whole sheet of paper, figuring we can use the extras at Parker’s party. And I let him try one out just to make sure it worked:
And finally, the Golden Snitch! I browsed around online and saw a ton of different variations, though not too many were made out of fabric. I decided not to try to match the golden/feathery wings that appear to be on the movie version of the Golden Snitch, and just went with sparkly felt wings. (I brushed some glue onto a piece of white felt and sprinkled it with glitter). I think the gold fabric was leftover from one of my husband’s food photo shoots long ago… I knew it would come in handy someday!
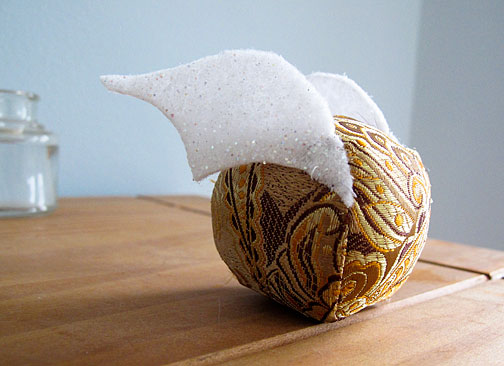
For the ball, I used a pattern in Abby Glassenberg’s new book, Stuffed Animals: from Concept to Construction. I will write a full review later (if there is one thing I HATE it is seeing “reviews” of craft books written by people who have not actually tried any of the projects), but I was so happy to stumble upon this ball pattern. I really liked how Abby shows several different ways of making the same shape _ I have made ball-shaped things before using the “orange peel” method … sewing a bunch of peel-shaped pieces together, but I liked the simplicity of the “baseball” method and thought it was perfect for this project because it doesn’t involve so many seams.
My first attempt did turn out a bit wonky, but when I tried again, and hand-basted the pieces together instead of pinning, it came out much better. I filled the ball with a combination of polyfil stuffing and rice, to give it a more bean-bag like heft. For Parker’s party, I’ll need to come up with a waterproof version, because he is planning a Quidditch match at our summer cabin, in the water!


So fun! You’ve inspired me to try some new products with my Silhouette.
What about spray painted tennis balls (with the felt wings possibly) for a waterproof, buoyant version of the snitch?
Thank you! A tennis ball would be great for the water snitch!
[…] previously, I tried out a bunch of the various techniques for making round objects when I made the golden snitch and bludgers for my Harry Potter-themed gifts. I ended up using one of those techniques again to […]