|
|
We had a wonderful Christmas. It was especially nice to have the day before and day after off from work in addition to Christmas day because the next two weeks are going to be extremely busy for me with the NH primary Jan. 10. I’m eager to share pictures of all my hand-made gifts, but I’ll probably divide them up in a few posts over the next week or so.
First up, some of the gifts for girls, young and old. Some of these were posted on my hidden holiday blog earlier.
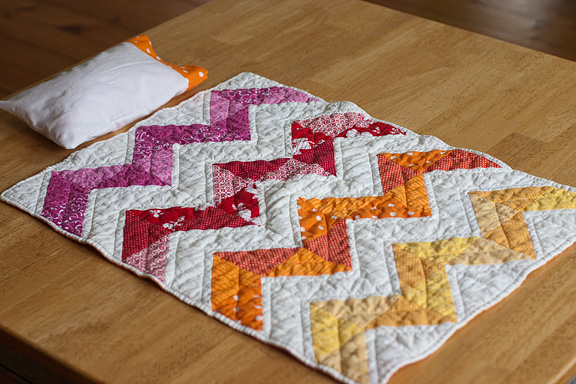
Here’s a little doll quilt and pillow I made for my best friend’s 4-year-old daughter, loosely based on a zig-zag quilt pattern I saw at The Purl Bee. I love how half-square triangles can be arranged in so many different patterns.
Instead of making a traditional “quilt sandwich” and binding this quilt, I just cut the batting and backing to the same size as the top, and layered them with the batting on top, then the quilt top right side down, then the backing right side up. I sewed all the way around the edges, leaving an opening for turning, and then turned it right side out. Because I added a narrow white border to the top, that ended up sort of looking like binding when I topstitched in-the-ditch along that seam. Good enough for a doll!

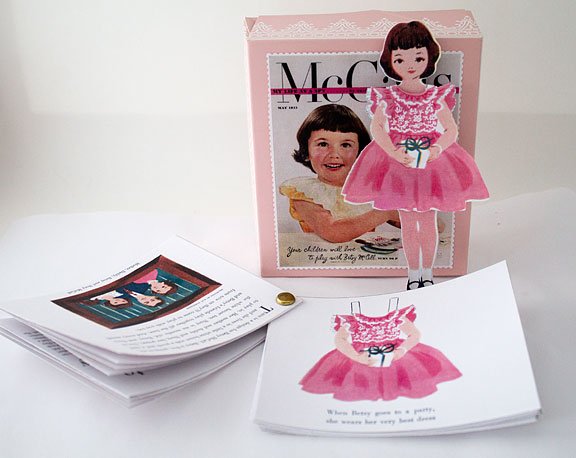
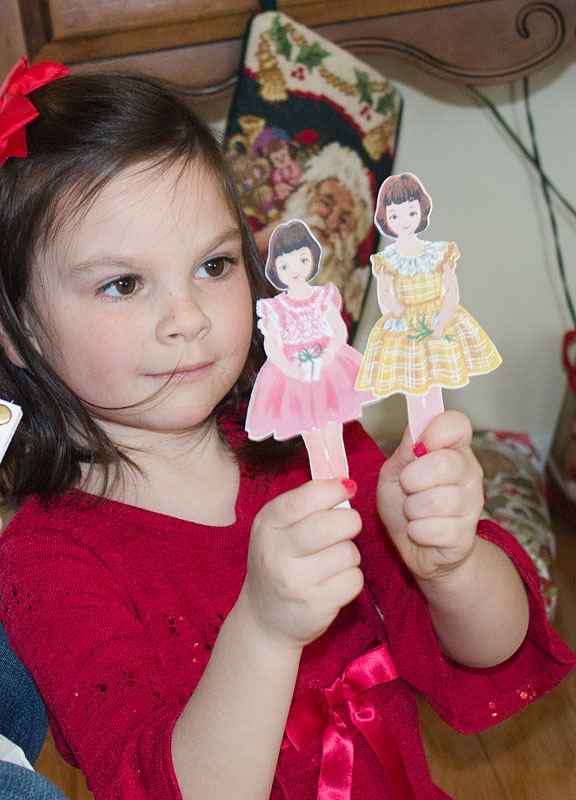
Speaking of dolls, I made these adorable paper dolls for my 6-year-old niece. I downloaded the Betsy McCall paper dolls from this website and used my Silhouette machine and its print-and-cut feature to cut them out. It took a little bit of work to do this, but once I figured it out it worked well, and now I’ll have the files all ready to go if I want to make more for someone else. (I used Photoshop to make solid black silhouettes of each shape so I could then trace them in the Silhouette software to get my cutting shapes.) I also printed small versions of each magazine page and made a little book, because I thought my niece might like the little stories that went with each outfit. I’m hoping to make more for her over the next few months and send them to her as a little surprise.
For the dolls themselves, I printed the doll on cardstock and then used the Silhouette machine to cut four blank dolls, and then glued the whole stack together. The dresses are cut out of plain white copy paper.
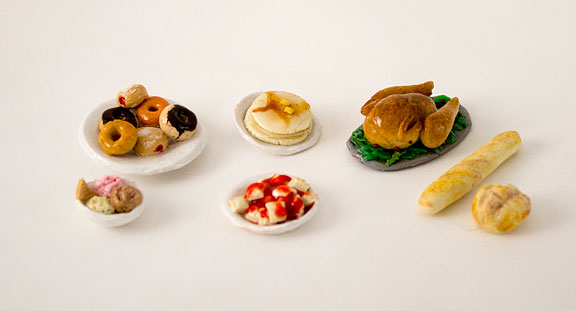
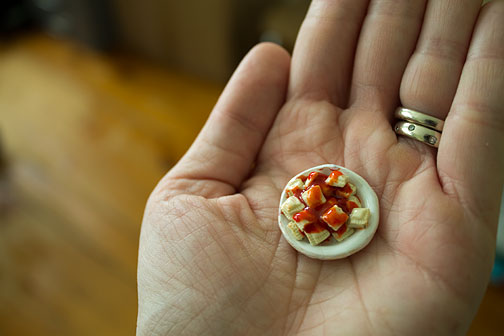
I also gave her a set of jewelry like the sets I posted about earlier this month, and some polymer clay food for her dollhouse. I didn’t end up making as much as I had planned (it takes a lot longer than you’d think to make such tiny food!), but she loved what I did make. (as did my son… he got the same set for his beloved toy cat figures).
And for the big girls on my list ….
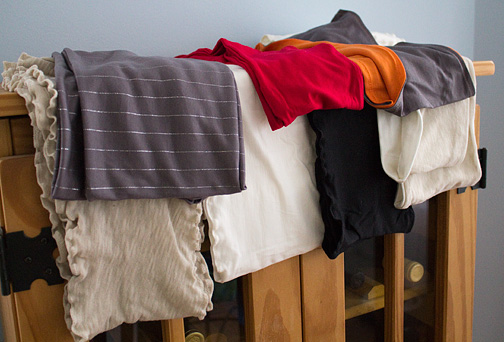
These are very similar to the ruffled scarf I made for my sister in October. I bought a bunch of different jersey knits from Fabric.com, some were as cheap as $2.99/yard, and I still have some leftover after making all these scarves. All of them are two-layers of fabric basically sewn into long tubes. Instead of the fussy way I was trying to fold over the edges and sew a satin stitch to get the edges to ruffle, I came up with an easier technique.
1) Cut a strip of fabric the width of your fabric (58″ in most cases for these fabrics) and twice the width of the finished scarf. (I cut 14 or 15 inches). (This is for a single-color scarf. If you want to use two fabrics, just cut two pieces, the width of the fabric and however wide you want the finished scarf to be)
2) Fold the fabric in half lengthwise, right sides together, match up the edges and pin along the long end. Sew along the long edge, making a tube of fabric. (If using two fabrics, pin them together right-sides together, and sew along both long edges)
3) Turn the tube right-side out so your seam is on the inside, and then press it so the seam runs up the middle, instead of along one edge. (if using two fabrics, skip this step, just press the tube flat)
4) Sew a narrow zig-zag along the folds of both long edges, stretching the fabric in front of and behind the needle as you go to create ruffles.
5) Close up the tube and make your finished infinity scarf using the technique described here.
Some of the fabric didn’t ruffle as much as others, but I ended up liking them all anyway. The tan/beige fabric is a very thin “tissue jersey.” The cream and black is a super-soft organic bamboo knit. The gray was probably the cheapest fabric, but I really like how it looks, both with the orange backing and on its own. For some of the scarves, I skipped the top stitching for the ruffles and just made un-ruffled scarves.
Even though I finished all my hand-made Christmas gifts with a day or two to spare, my mind keeps flitting to all the projects I wanted to make for myself (mostly decorations.) I even started making a little winter village this morning before work, and it is sitting on my desk right now. But really, I should just stop and enjoy Christmas with my family, right? Right.
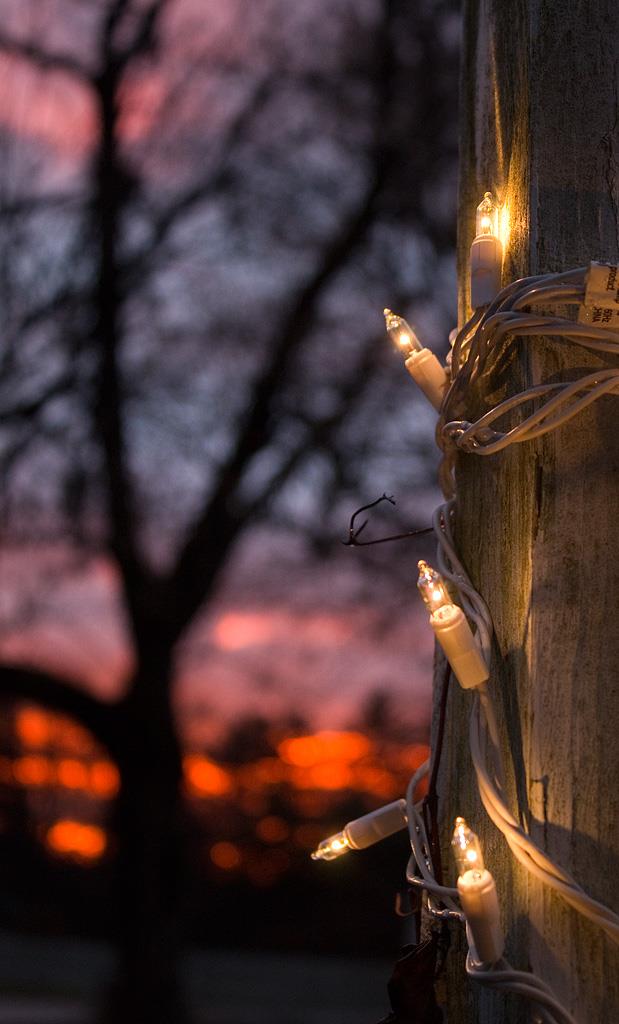
So in that spirit, here are a few pictures I snapped yesterday morning, when we had an absolutely gorgeous sunrise. (Today, we woke up to snow, but it has already melted. Eighteen inches of snow at Halloween, none for Christmas. WRONG.)
For all my readers, thank you for all the encouragement this year. It means a lot to me.
(and if you’re looking for a fun holiday read, check out this AP story I wrote about how Rudolph the Red-Nosed Reindeer REALLY went down in history.)
Way back in November, I bought about a dozen clear, glass ornaments at Michael’s when they were on sale for 50 percent off. My plan was to come up with a few different ways to decorate them and then write a craft article for AP. But my first idea was a disaster, so I ended up just writing about one project.
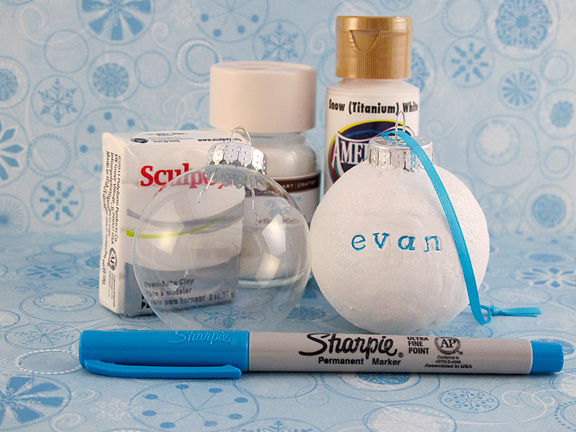
This project was inspired by an ornament my mom made me when I was 4-year-old. She used to go to a paint-your-own ceramics place, and made me this cute ornament that has a little Christmas scene inside a snowball. I decided to make a simpler version (just a snowball) by covering a glass ornament with polymer clay.
(I’ve seen other tutorials that produce similar snowballs, some by covering foam balls with joint compound, etc. but I wanted to be able to personalize mine by imprinting a name into the clay).
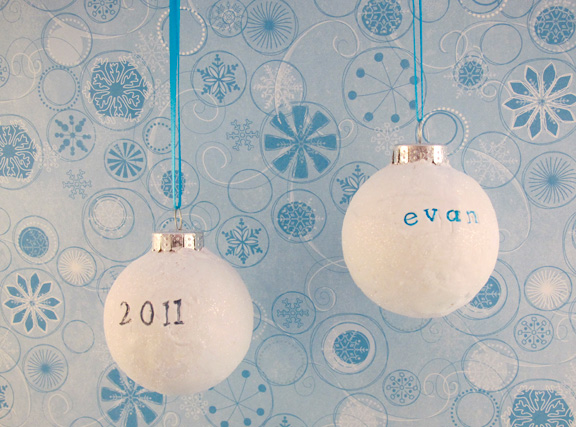
Now that I look at these close-up pictures, they look kind of messy, but from arm’s length, they are quite pretty! They are covered in fine, clear glitter that doesn’t really show up well in photographs.
You can read my tutorial here (NOTE: News story links often don’t stay live very long. If this link goes dead, just Google “Holly Ramer” and “snowball ornament.”)
(In case you’re curious, here was my other idea that did not work at ALL. Maybe someone has some tips?)
My first idea was inspired by these brightly colored ornaments at Land of Nod. My idea was to paint the insides of the ornaments in bright colors, and then etch names on them, so they would be personalized, but in a subtle, modern way. I can’t tell you how much time I wasted and never ended up with what I wanted.
I’m not sure what went wrong with the etching, but it came out so light you could barely read it. I’ve etched other things before with great results, so maybe it has something to do with the glass for these particular ornaments? I also tried a frosted glass spray paint that is supposed to mimic etching, but had the same trouble. It was so subtle, you couldn’t really read the names.
And I had a ton of trouble painting the insides of the ornaments. When I used just regular acrylic paint (squirting the paint in and then swirling it around), the paint cracked and slid off as it dried. I then got paint specially made for glass, which worked a bit better but it was still too thick to swirl around. Adding a bit of water helped, and they looked great initially, but after drying, I ended up with the same cracks and streaks. So I gave up.

The winner of my giveaway is comment #20, Alyssa T, who said :”Favorite tradition is dipping beeswax candles for gifts with my boys. Your coin purse is so lovely!”
Thanks to everyone who entered. Once the holidays are over, I hope to check out some of your blogs, as well.
(If you’re looking for my giveaway post, click here)
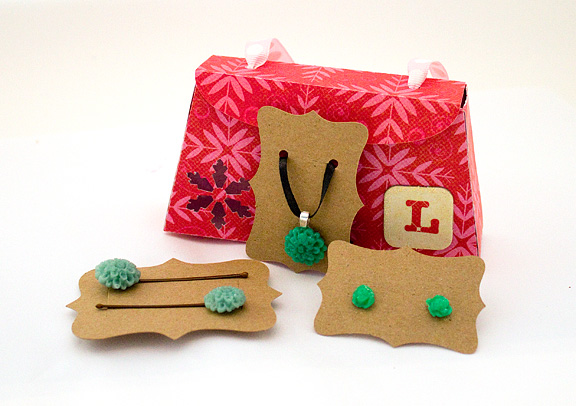
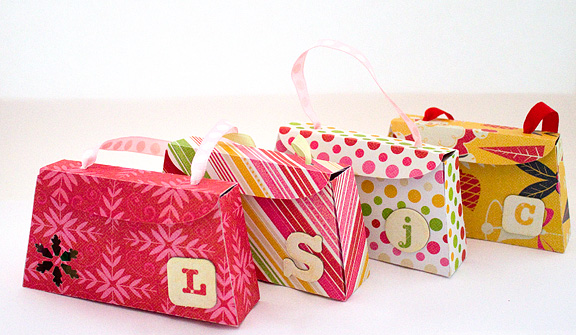
Here are some of the Christmas gifts I finished last week. My cousin has four daughters, ages 4-11, and my sister has a 6-year-old daughter, so I’m always looking for cute but inexpensive gifts for them. (though I would wear these myself if I had any leftovers!) These were so easy. The jewelry is made from polymer clay using a few silicone molds from Mold Muse, and I made the little purse/box and the tags using my Silhouette machine.
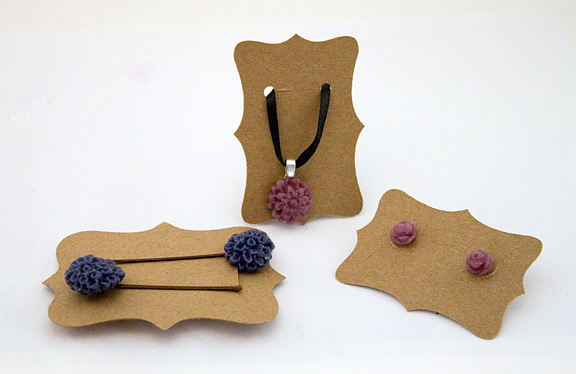
If you like the bobby pins and earrings, see my giveaway post for a chance to win a set!
I’ve also started posting more handmade gifts on my “hidden” holiday blog, so if you need that link, leave me a comment or send me a note.
THIS GIVEAWAY IS NOW CLOSED
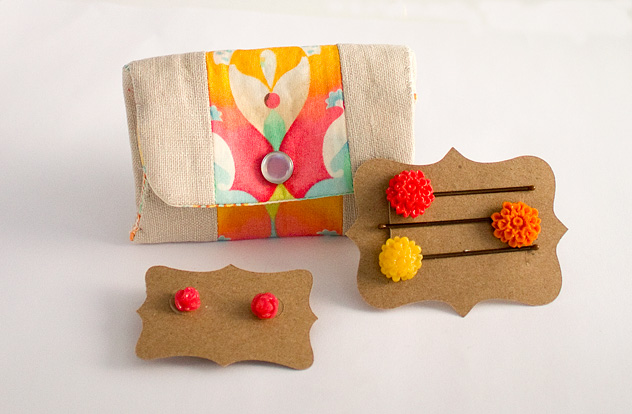
I’m so glad Sew, Mama, Sew!’s Giveaway Day starts today, and not last week, when I was home all week furiously (almost) finishing all my handmade Christmas gifts. I wouldn’t have gotten nearly as much done with all the distraction!
I’m offering this little snappy coin purse (made using this tutorial by Rashida Coleman-Hale) and a set of hair pins and earrings I made out of polymer clay. I made a ton of these to give to my niece and my cousin’s four daughters for Christmas. This set would be a great stocking stuffer!
Just leave me a comment below for a chance to win. If you feel chatty, tell me about a favorite holiday tradition.
Good luck! And come back later in the week when I’ll be showing off some of the 20 or so gifts I made last week!
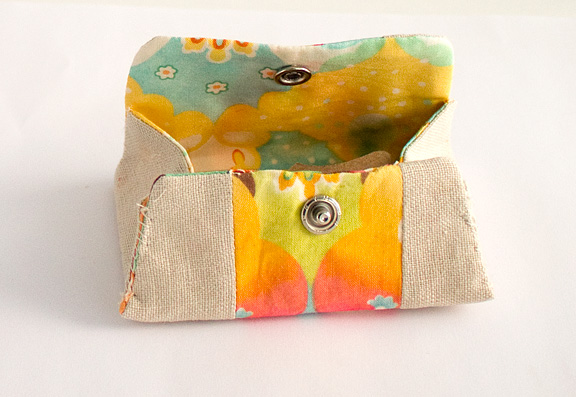
Don’t forget to check out all the great giveaways!

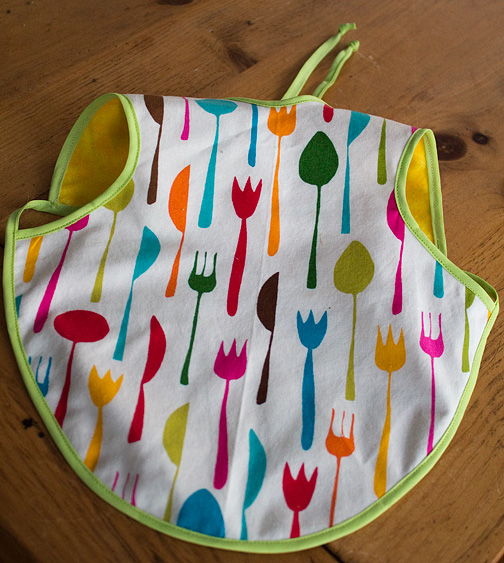
This little bib/apron (or “bapron”) was so easy to make, I wish I had more babies to make gifts for. This one is headed to a friend of my husband’s, who is having a baby next month.
When I made this, there was a free pattern and tutorial at Craftiness is Not Optional, but if you follow that link you will see that the pattern now costs $6. For some reason, mine looks smaller than the original, especially the arm holes. In fact, I couldn’t really lay mine out to take a picture of it the way it’s shown on the original site. Maybe I cut my bias tape the wrong size? I think it’s OK though, it might just work for a smaller infant, which is fine. Or maybe I screwed up and it really wasn’t such an easy project after all!
I unexpectedly have next week off from work because we have to use up all our vacation by the end of the year instead of carrying it over… so I need to come up with my Christmas sewing/crafting master plan!
My mother’s birthday was last week, but this year I’m getting her something for her birthday and Christmas combined, so she’ll have to wait a few more weeks. I wanted to give her a little something on her birthday, though, so I made her a little 5X7″ photobook by pairing Christmas pictures of her three grandchildren with lyrics from Christmas songs. (She took almost all of the pictures… she is a great photographer and had her own business for a while!) I used a bunch of different digital scrapbooking supplies from the vast collection I amassed back when that was my main hobby.
I made a double-page spread for each year since 2004, and printed the book through Snapfish.
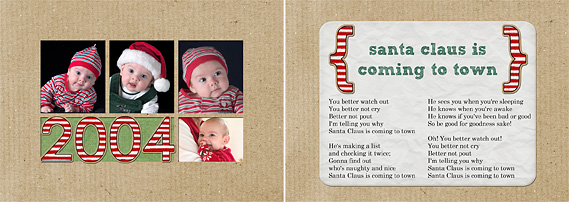
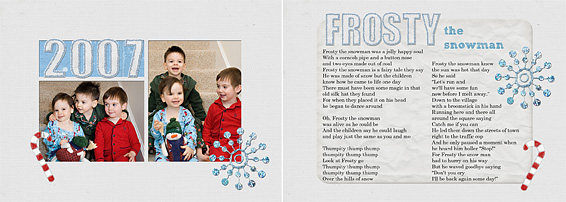
I also had 4X6″ prints made (a lot cheaper than the photobooks) and just put them in an album I already had to keep for myself. It was only AFTER I had given my mother her book that Parker and I were singing some of the songs (he has been asking to go caroling in our neighborhood and I am desperately trying to talk him out of it. We sing badly, both of us) that we noticed a typo. (That’s what I get for copying and pasting from the Internet… I thought I had proofread the songs, but not well enough.)
So… in the song “Winter Wonderland” we got to the verse that starts:
In the meadow we can build a snowman,
And pretend that he’s a circus clown,
We’ll have lots of fun with Mr. Snowman,
Until the alligators knock him down.
ALLIGATORS! I was mortified, but Parker thought it was hilarious. And when I told him the real lyrics say “all the kiddies,” he thought I said “kitties,” and he’s so crazy about cats, that’s how he wants to sing it.
I’m tempted to make a little sticker to correct my mother’s book (and the one I made for my sister’s kids), but it might be just funny to leave it alone and see if they notice.
In other news, my husband was on the Martha Stewart Show today! (I missed it, though, because I was at work). She had him on to talk about the creative lunches he packs for Parker every day. (This morning, I was told I could have a few of the mini quiches he was making for breakfast/lunch, but “not the pretty ones” because those had to be photographed for his blog.)
Speaking of his blog, he’s running a contest now. Suggest a lunch for Parker, and you could win Matthew Mead’s new Holiday magazine. Check it out HERE.
Thanks for all the advice re: what color pillows I should use for my sofa. For now, I’m going to go with red, because I happened to find some great, ridiculously cheap fabric. My college roommate was visiting last weekend, so we went shopping at the outlet stores in Kittery, Maine, where we found this 58″ wide Marimekko fabric (the design is called “Madison WI”) for $3.95/yard at the Crate & Barrel Outlet (regularly $35.95!) So I snatched up a yard each of several different colors, plus some extra of the red.

I love that it has a variety of tones, and the design has wide stripes… so I’m going to make just simple pillow covers instead of the more elaborate patchwork designs I had been envisioning. The fabric is a nice, heavy cotton, maybe a sateen? Anyway, it was cheap enough that if I don’t love the pillows, I can always change them. And maybe I’ll do the yellow for summer.
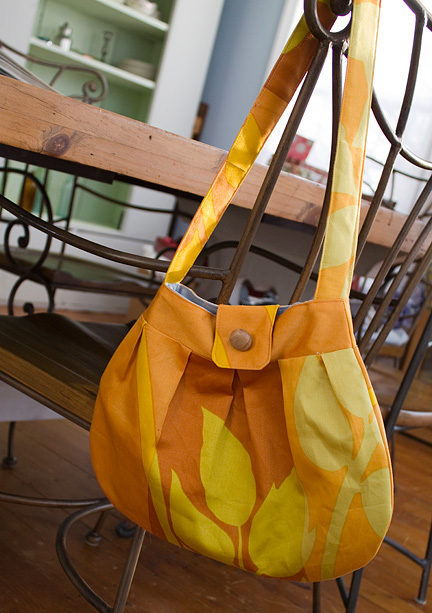
In the meantime, my friend and I made some purses. This is an enlarged version of the Buttercup Bag at Made-by-Rae. I wish I had made the top opening a bit wider, it seems a little cramped. We didn’t use any interfacing, but used leftover gray fabric from my slipcover as the lining, which makes it pretty sturdy.
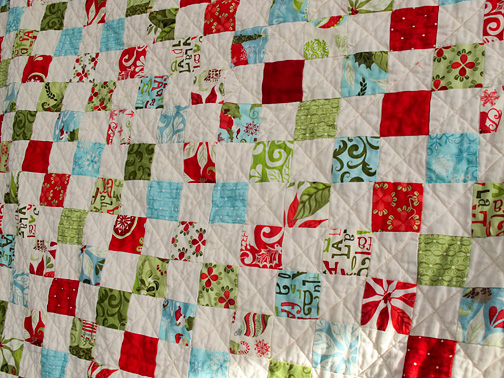
Or, at least ready to curl up on the (newly slipcovered!) sofa and hide when I get overwhelmed with everything I want to do before the holidays. I finally finished this quilt that I started in January. The quilt top was done in January, then I waited until summer to baste it and quilt it. The binding finally went on last weekend. I consider finishing it before December a major success.
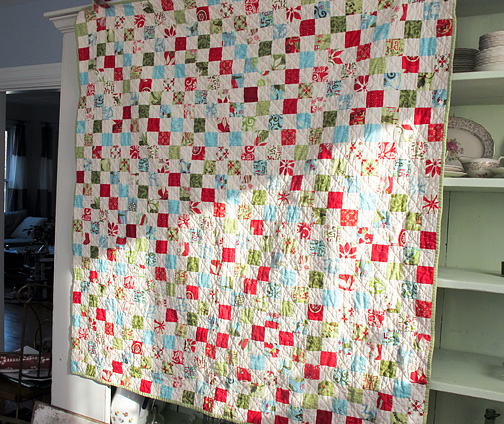
These photos aren’t great, it was a little too sunny. And I forgot to take a picture of the back, which is a coordinating flannel print, which will make it extra snuggly. And since I made my quilt square instead of the larger rectangle called for in the original tutorial, I have a lot of patchwork strips leftover that I’m going to use to make either placemats or maybe even a small quilt for someone else.
|
|

