This little project reminds me of the saying “The cobbler’s children have no shoes,” though in this case, it would be “The cobbler herself has no shoes.” For YEARS, I have been using a small, leather wallet that does not work very well at all. It has slots for cards, but when I actually put cards in it, the fold-over flap doesn’t snap. Yet I have kept using it, despite the fact that I know how to sew and have seen probably dozens of free wallet tutorials online over the years.
I finally decided to do something about it on Sunday. My husband kindly took Parker to visit his mother for a few hours, so I figured, why not use that precious free time to make something for myself for a change?
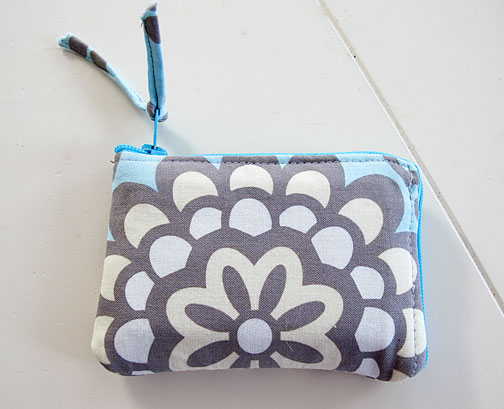
I used the Zipper Card Pouch tutorial at Craft Passion. I have to say, I found the directions pretty confusing. At several points, I had to zoom in on the photos to get a better idea. The most tricky point was the first step involving sewing the lining to the zipper. Miraculously, I did not make any major mistakes, but the whole time I was making it I was thinking, “I will never make this again. Too fiddly.” Yet, now that I have a bit of distance from it, I’m starting to re-consider. (I think if I make another one, I would not use such heavy fabric/interfacing). I used quilting-weight cotton and heavy interfacing for the exterior, and leftover twill/canvas from my never-ending slipcover project for the lining.
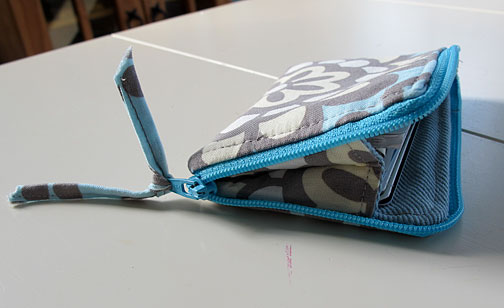
I didn’t have an metal zipper, which I think would look nicer, or any twill tape, but I stuck to my “use it or lose it” mantra and did not go out to buy new supplies. There is supposed to be a strip of twill tape on one side of the lining, to make a divider. I used strips of wide elastic on both sides instead, which I think would’ve worked great had I not inserted the lining pieces upside down (so the elastic is almost at the bottom of the pouch), and had I made the elastic just a bit tighter.
I also did not have twill tape to cover the raw edges inside. I tried using narrow seam binding, but it was a bit too narrow given the thickness of the fabric layers. So I just zigzagged the raw edges, and that worked fine.
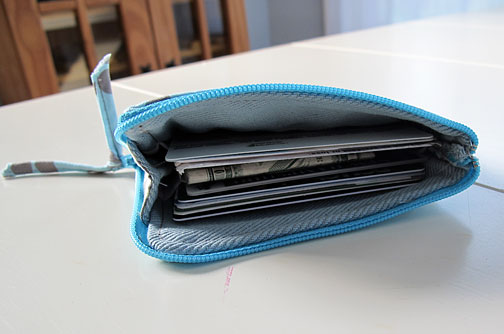
All and all, now that I’ve used my wallet a bit, I do like it. It is smaller than my old wallet but more functional, with plenty of room for a stack of cards and a bit of cash.
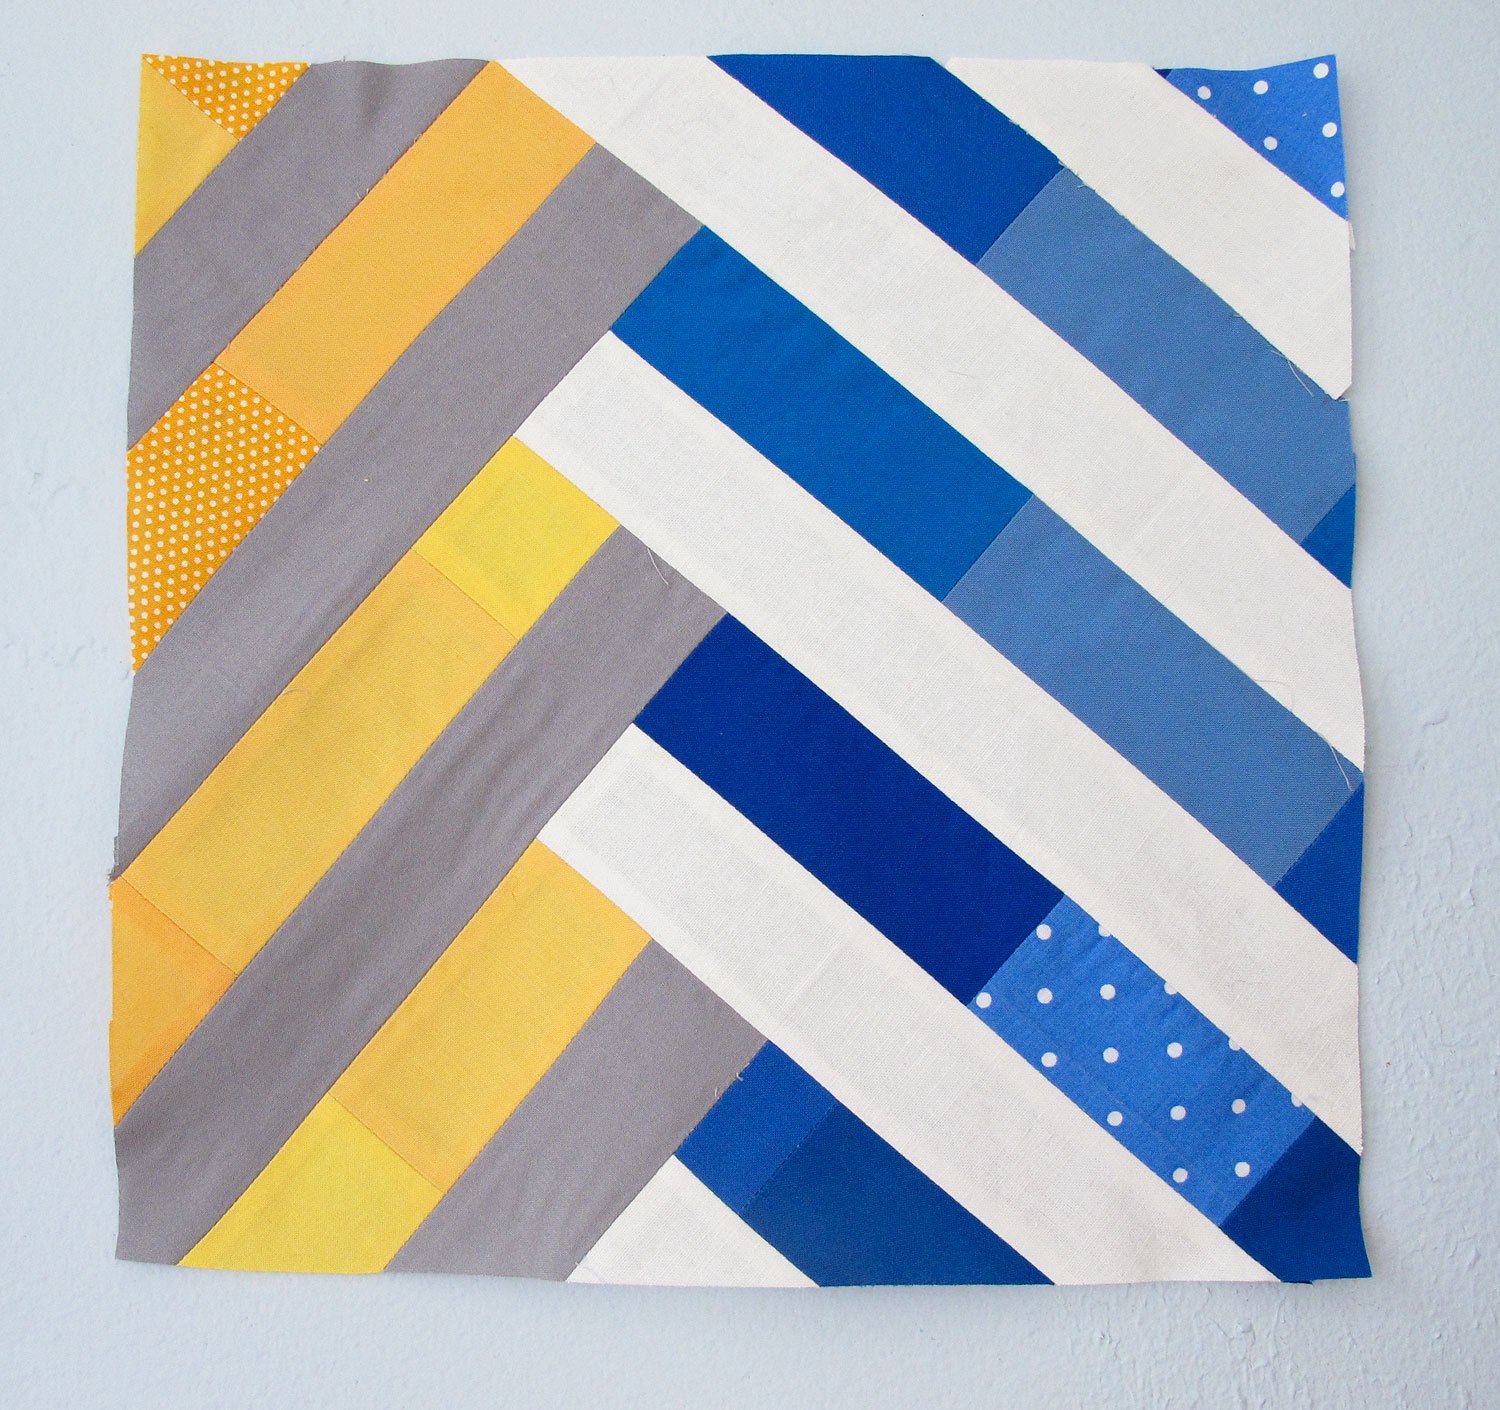
Before we get to the giveaway winner, I wanted to encourage any quilters out there to submit a block to the Boston Modern Quilt Guild, which is making quilts for those injured in the Boston Marathon bombings. The deadline is May 24. (click on the image below for more details)
The guild is asking for quilts using the colors of the marathon: blue, yellow, white and gray.
I used a pattern that was part of the Modern Block-of-the-Month sew-along at Sew,Mama,Sew! And what was great about that series is that all the blocks use the very same color scheme I was looking for!
It turned out I did not have enough yellow fabric, so I ended up piecing together leftover charm squares from my camp quilt, plus a bit of polka dot fabric. I liked it so much I did the same for the blue pieces.
Now… back to my giveaway. The random number generator picked #19, which was Susan, who said: “So pretty! I love peanut butter and chocolate. mmmm.”
That actually is one of my favorite flavor combinations as well. I loved reading everyone else’s comments, too. There were quite a few flavors I have never seen here… like licorice! (I would not like that one, however).
Thanks to everyone who entered! Susan, I will send you an email to get your contact information!
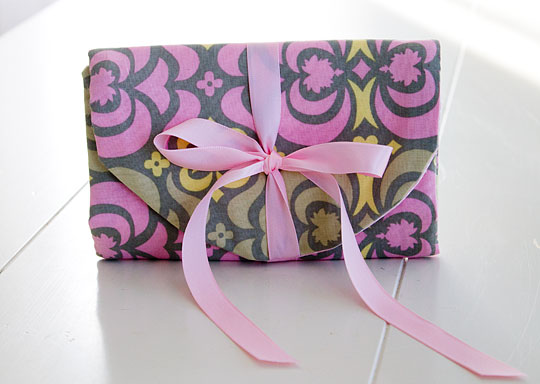
I completely forgot about Giveaway Day at Sew, Mama, Sew! until this morning, but lucky for you, I also finished up a little project last night. I actually was going to give this to my mom for Mother’s Day, but instead, it will go to one of you lucky readers! (Don’t worry, I will make another for mom).
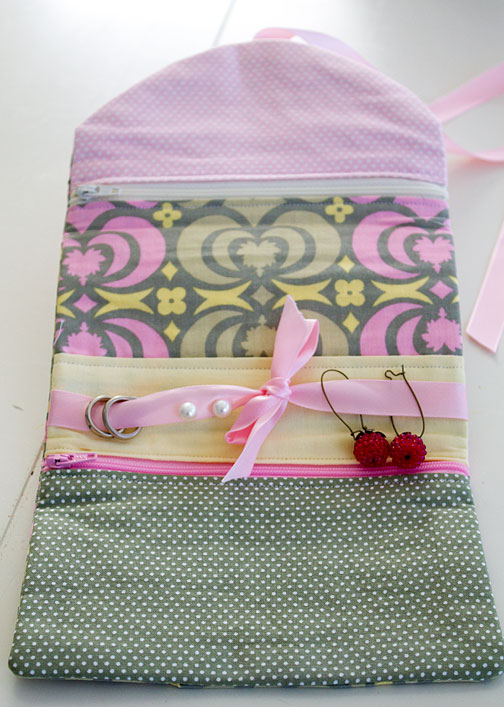
This is a jewelry roll from the book “One-Yard Wonders.” It has two zippered pockets, plus a ribbon that you can use for rings and earrings, to keep all your jewelry safe and organized when you travel.
(jewelry NOT included!)
For those who are new to my blog, I hope you’ll come back and look around! As a bit of background, I’m a reporter for The Associated Press by day, crafter by night. Sometimes the two intersect and I get to write sewing and craft columns for AP, but my main job is covering politics and other topics in New Hampshire. My husband is the national food editor for AP, and we have an 8-year-old son who enjoys sewing as long as it involves jamming his foot down on the sewing machine pedal as hard as he can!
For a chance to win, please tell me your favorite ice cream flavor. (Mine is coffee oreo… I used to work at an ice cream shop in high school, and that was one of the flavors there. I don’t come across it too often, though).
I will close comments at 10 p.m. EST Friday, and will announce the winner Saturday. I will ship internationally.
Please check out all the other great giveaways by clicking the image below:
If you want to have anything new to post on your blog 🙂
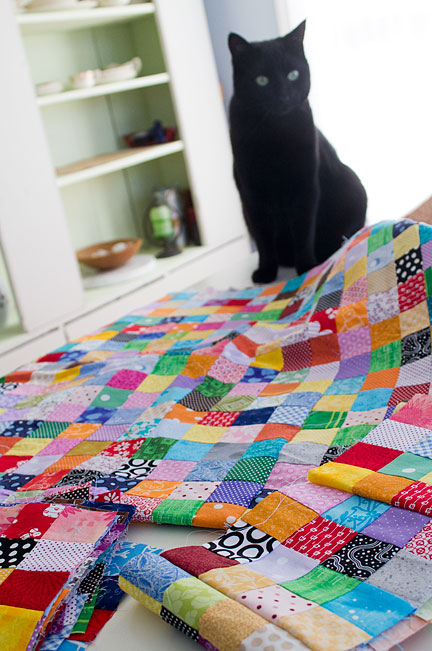
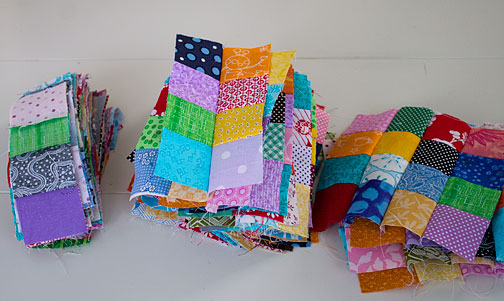
OK, I can’t blame my entire lack of blogging on my friend and fellow crafter, Annmarie. But it is true that during our most recent get-together, I sewed a bunch of the squares for my postage stamp quilt together the wrong way and didn’t get nearly as much done as I thought I would. But I don’t mind a bit because we had fun, as always!
So here is my unfinished quilt top … I think I’m about two-thirds done and I really like it so far!
Since I don’t have any other projects to share, please indulge me in a bit of spouse promotion. My husband’s next cookbook is now available for pre-order on Amazon.com.
And here’s a little promotional video about it, featuring Rachael Ray. She has a new imprint with Atria Books, and Jason’s book will be the first to be published as part of that new venture.
My best friend has a young daughter whose late-March birthday always catches me by surprise. I have no idea why, but I always forget it’s coming. So my gifts are always late. (See the cute bear carrier from two years ago, or last year’s Cabbage Patch Kid doll clothes).
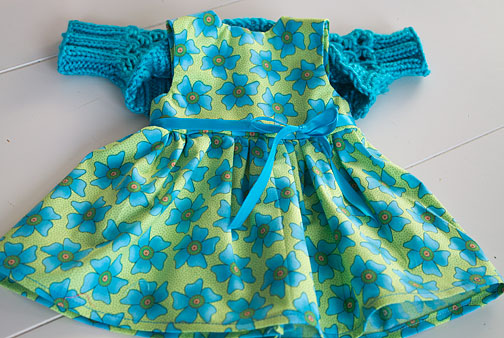
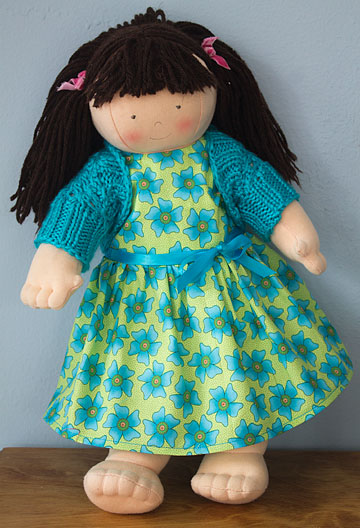
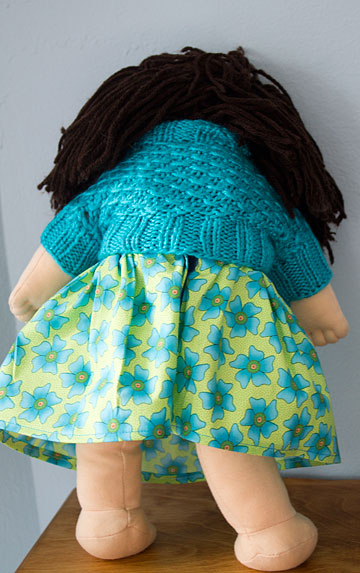
This year was no exception, but I’m glad I procrastinated. It turns out that the birthday girl got an American Girl as one of her gifts, so I decided to make her an outfit for her new doll. I had purchased Simplicity 3547 and another similar set years ago thinking I would make clothing for my niece’s doll, but I’ve only ever made one set of pajamas. So this was a great chance to cross off another “use it or lose it” project and actually use some of the many patterns I bought on impulse when they went on sale. I also knitted a little sweater/shrug to go with the dress using this pattern.
Not bad for my first knitted “garment.” I had the yarn leftover from another project, so altogether, the only thing I bought for the entire outfit was the ribbon for the sash on the dress.
This is one of my niece’s dolls modeling the outfit. This doll is actually a bit larger around the middle than an American Girl doll, so the dress doesn’t fit exactly right, and the shrug is a bit snug. But it gives you a better idea of how it looks.
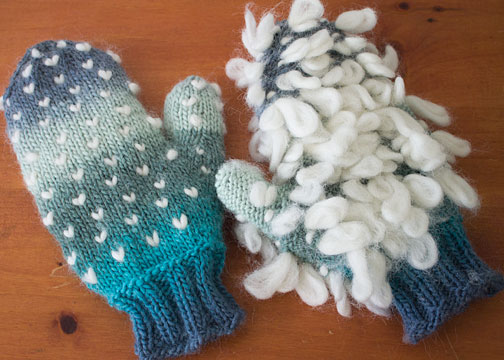
I finished my thrummed mittens for my sister! March 28 may seem late for new mittens, but we do still have a bit of snow on the ground, so they will be an appropriate Easter gift! The mitten on the right is turned inside-out, obviously, so you can see the bits of fleece roving that are knitted into the mitten.
This is my first pair of completed mittens, so my standards are low. Are they perfect? No. (The little white “puffs” of fleece on the right hand glove are much bigger than those on the left, so they don’t actually match very well). But are they warm and wearable? Yes.
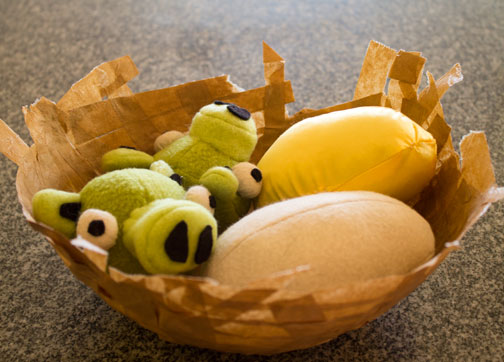
Parker wanted to do some crafting with me last weekend, and though I would’ve loved to make some kind of cute, pastel, Easter decorations, he wanted more Angry Birds accessories. (I previously made him a few birds and a pig using the patterns and tutorials at Obsessively Stitching). I used the baby pig pattern from there, and an egg pattern from Martha Stewart.
You will note the eggs are rather lumpy. I was determined to make sure Parker actually helped, so I had him cut out the pattern and trace it onto the fabric, and he handled all the stuffing for both the eggs and piggies.
We also made a nest, loosely following this tutorial at AlphaMom, though we didn’t cut our paper into such tiny strips. In retrospect, doing so would’ve looked a lot better, but Parker was thrilled with our version anyway.
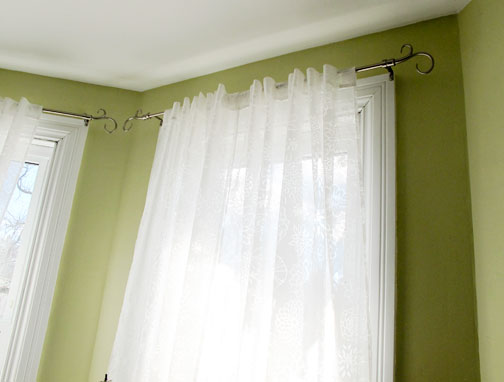
A few months ago we bought these pretty floral, sheer curtains from IKEA, finally replacing the plain linen curtains our cats have torn and shredded in our home office. And doing so seemed to spark a house-wide curtain-replacing campaign. Next up was the living room. Even though I made curtains not too long ago, I just didn’t love them. It doesn’t really show up in that photo, but the fabric is fairly shiny and it just bothered me, as did the fact that they probably should’ve been a few inches longer.
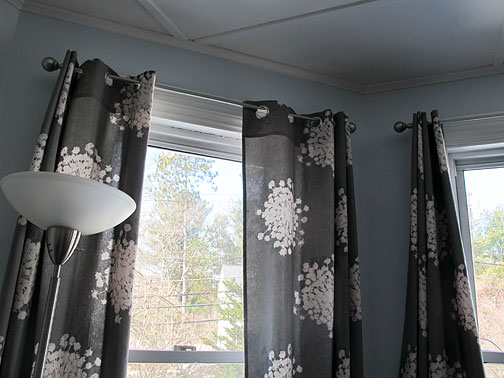
So I bought new curtains when they went on sale at West Elm. (My husband didn’t like them when I showed them to him online. But it’s his fault… he wanted a silly, pretentious mason jar/cocktail shaker from West Elm for Christmas. Otherwise I would’ve never seen the curtains).
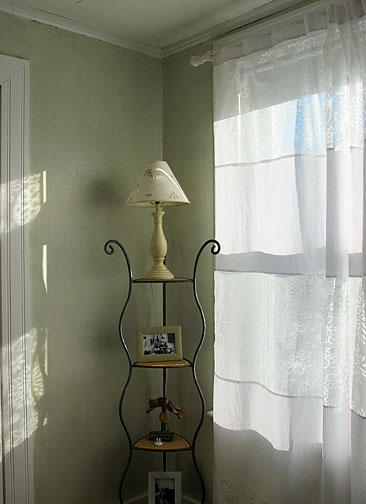
In both cases, I had to hem the curtains. The living room panels were just a few inches too long, but the office curtains were a good 18″ or so too long. So I used the leftover fabric, paired with leftover fabric from the curtains I made for our camp last summer, to make new curtains for our guest room. (Again, the cats had wrecked havoc with the muslin curtains up there).
The old living room curtains ended up in our bedroom. I hung them doubled up, i.e., two panels held up as if they were one, so they would be a bit less sheer.
And then Parker felt left out … so we bought him some new curtains from Target to replace the faux Roman shades I made for his room a few years ago. I really liked those shades, but some of the grommets I used had torn loose and the fabric had faded. I actually didn’t realize just how much they had faded until I looked back at that old picture!
All that curtain hanging made me realize two things: My windows are really dirty. And curtains are very challenging to photograph (particularly if you are too lazy to clean up the rest of the room and take wide-angle shots). Ha!
In other crafting news, I’ve now knit three different mittens. Hopefully soon I will complete a pair. The first was just a test out of cheap yarn to see if I could actually manage to follow a pattern. Check! The second was a slightly more difficult pattern, using nice thick wool, that includes a flap so you can fold down the mitten top. (very handy if you’re a reporter like me and need to be able to write outdoors!) But I ran out of yarn while making the second mitten in that pair, so that’s on hold. The third mitten is for a loved one who was just diagnosed with Raynaud’s syndrome, which affects circulation. This pattern involves incorporating bits of fluffy fleece roving inside the mitten to make what is called “thrummed” mittens … so far, it looks a bit like an oven mitt/boxing glove, but I think they will be super cozy and warm.
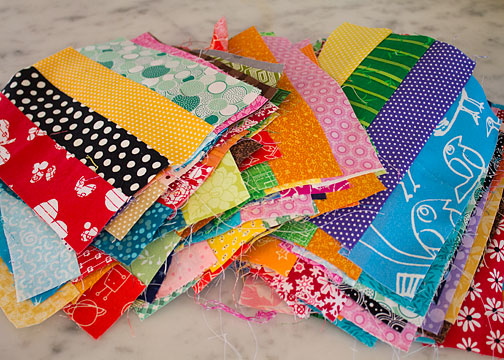
And I’m making progress on my “use it or lose it” postage stamp quilt! As I’ve been putting the blocks together, some look really great and others… not so great. But I keep telling myself it will all look OK once the whole random mess is together.
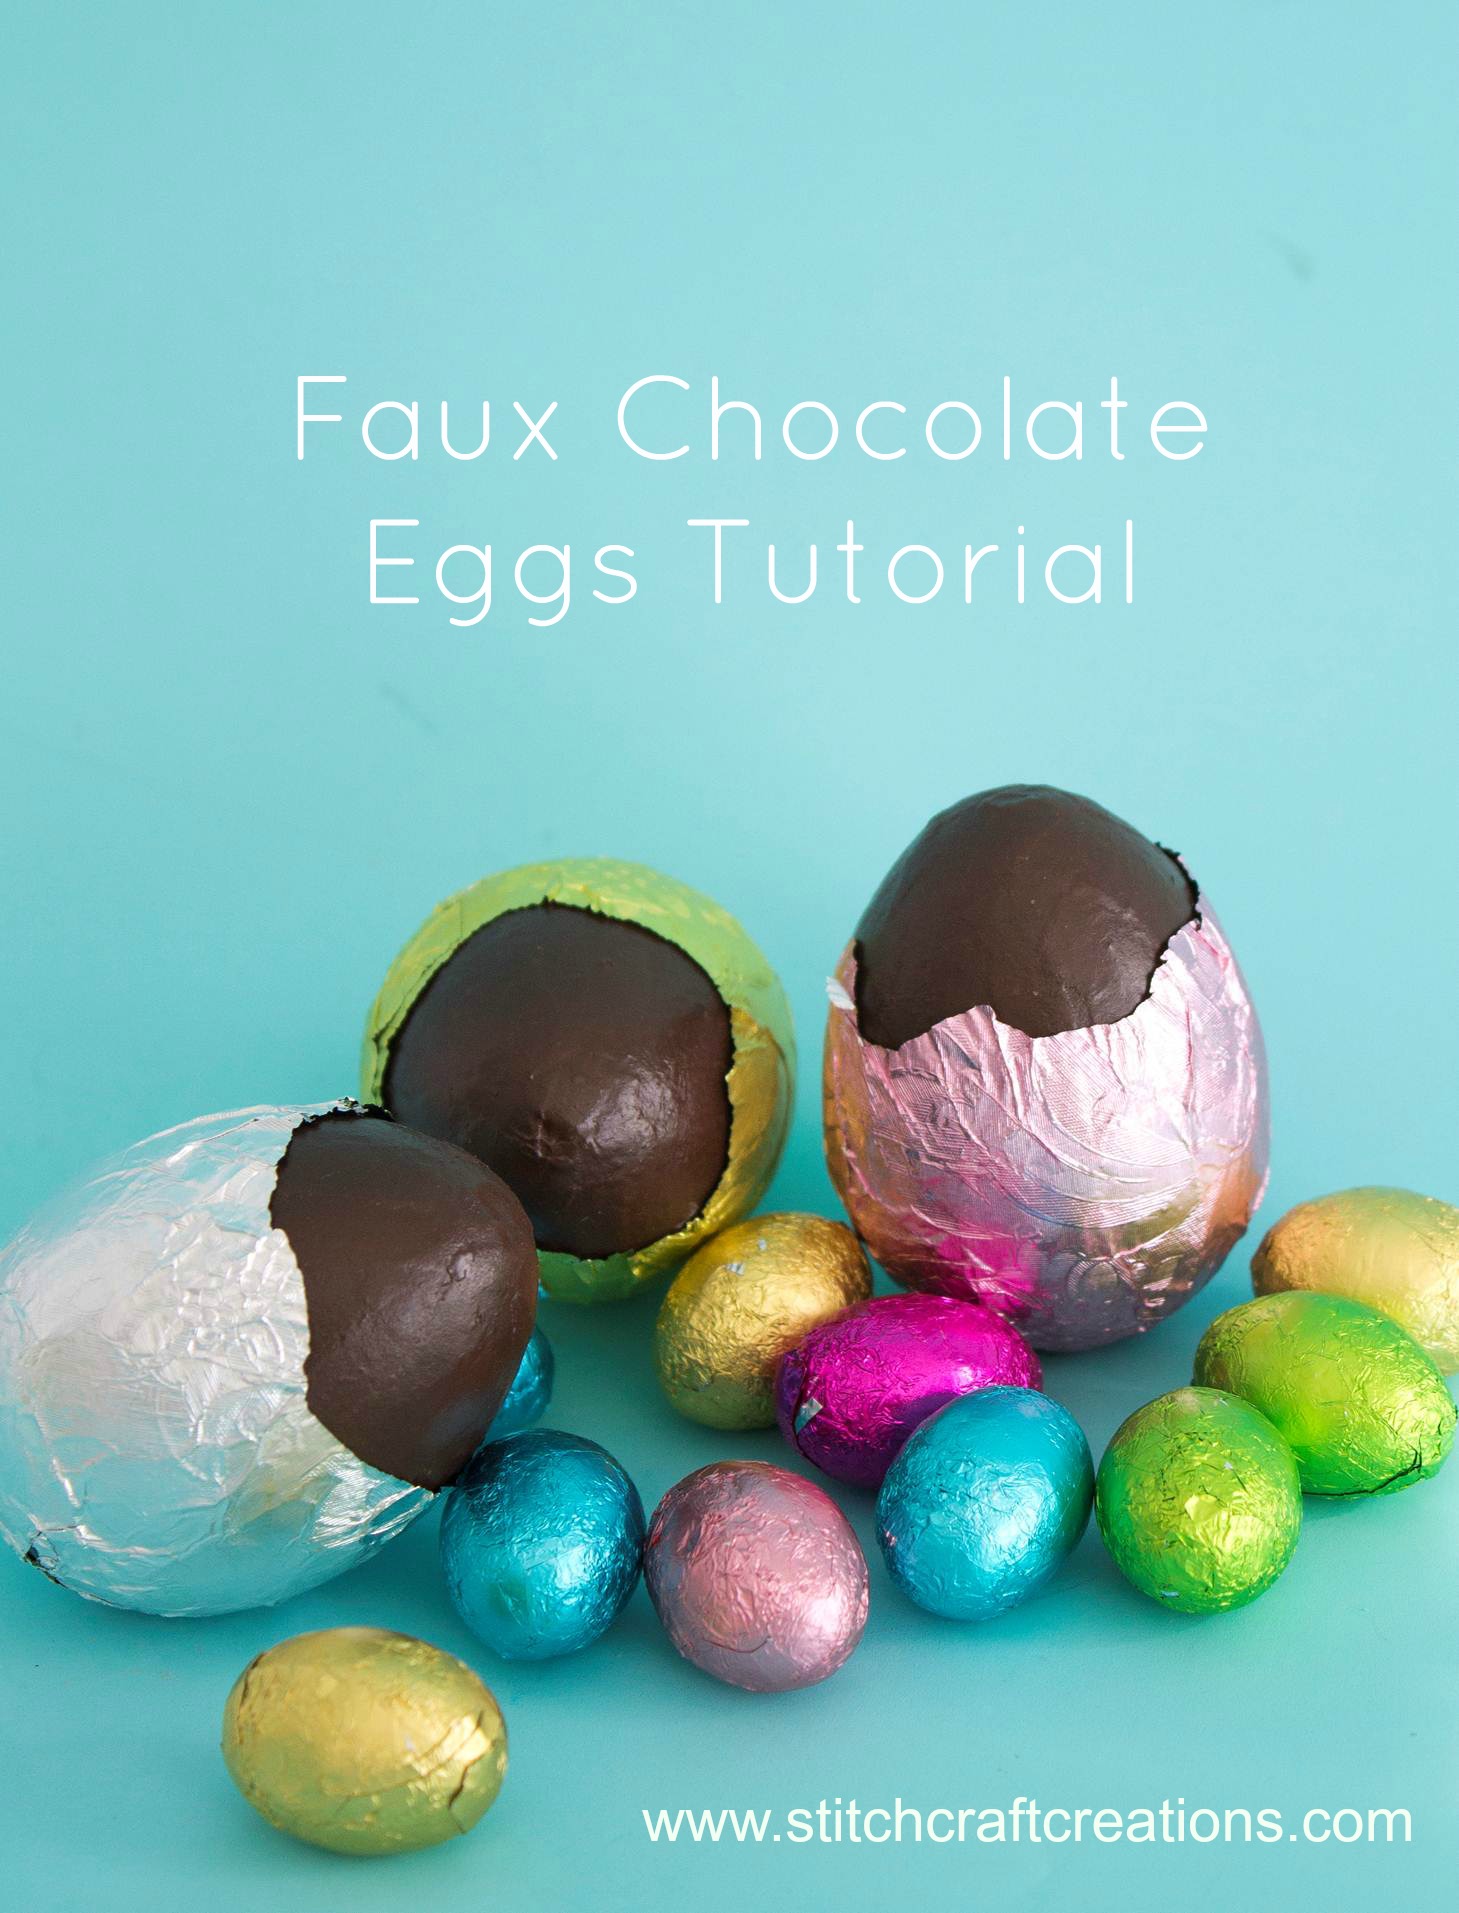
Here’s a quick craft project that can pull double duty for both Easter and April Fool’s Day, which are just one day apart this year. Faux chocolate eggs!
I have seen a few other tutorials online that involved painting plastic or papier mache eggs to resemble chocolate, but I wanted to go a step further and include foil wrappers. I was thrilled that my local candy and cake decorating shop sold several colors of foil for an extremely inexpensive 35 cents per foot. You can find the full tutorial here in the article I wrote for AP.
Here are some past Easter projects. Click on the pictures to go to the post. (I must confess that my cats got ahold of some of the felted eggs and they are no longer so pretty!)
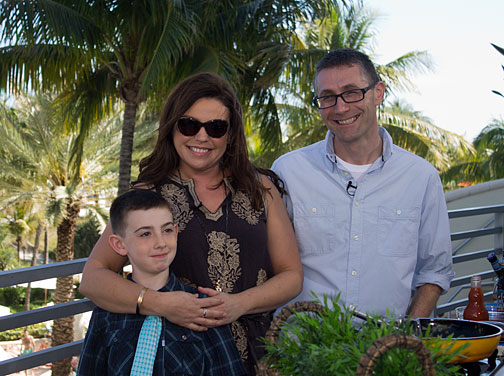
Last week we took our annual trip to Miami for the South Beach Wine and Food Festival. My husband writes about it every year for AP, and I tag along to help out. It is such a nice break from the long New Hampshire winter, though the celebrity food scene isn’t really my “thing.” This trip coincided with the official announcement of Jason’s next cookbook, which will be the first book published by Rachael Ray’s new imprint with Atria Books. Very exciting! Here’s Rachael with Jason and Parker, who insisted on “dressing up” in his button-down shirt and tie.
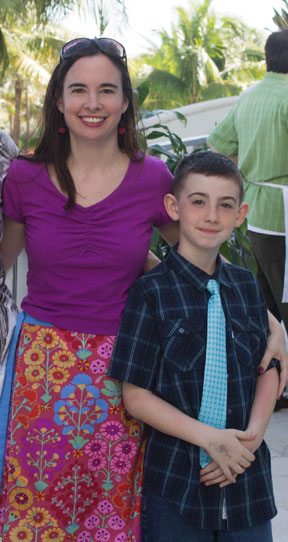
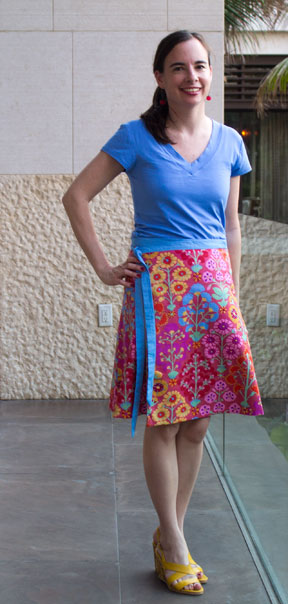
I, meanwhile, was wearing my latest “use it or lose it” creation. This skirt allowed me to accomplish two goals: finally using this pretty fabric that my friend Annmarie gave me more than a year ago, and finally making something out of “Sew What! Skirts,” a book I purchased even longer ago than that. I forgot to take a picture of the other side, but this is a reversible, wrap-around skirt. Though this book is all about using your measurements to make a pattern, I cheated a bit and used a pattern from another book (more on that later) since I already knew it was the right size. I wasn’t originally going to make the skirt reversible, but I worried that the floral fabric was too thin, and making it reversible not only gives the skirt a nice weight, it’s easier to sew (no hemming!), and I get two skirts in one! (The other side also helped my stash-busting goal… it is leftover light gray fabric from the whale pillow I made almost two years ago!)
Rachael Ray actually complimented me on this outfit!
Here’s a better view of the whole skirt from a different day.
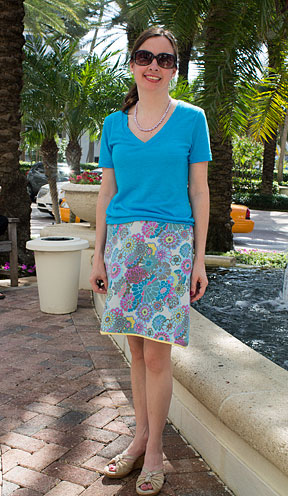
I also wore another skirt I made using the bias skirt pattern from the book “One-Yard Wonders.”, again using fabric from my friend Annmarie. I actually made a different skirt with this fabric last year using an online tutorial, but I was never happy with the way it hung, so I ripped out the side seams and waist and re-made it using the One-Yard Wonders pattern. Very, very simple. It’s a tad short because I had to cut off the original waist, but the shape is much better.
But now we’re back home in snowy New Hampshire. Though our favorite ice cream place re-opened for the season while we were away, so spring can’t be too far off!
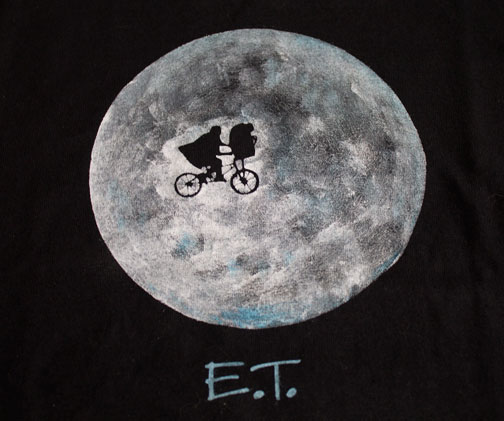
About two weeks ago, we had a special family movie night and watched “E.T.” It was Parker’s first time seeing it, and my first time since I saw it in a movie theater when I was nine years old. It was just as good as I remembered, if not better. But unlike when I was a kid, this time, I cried and cried … and cried …. at the end! Parker was not so emotional, but he did really enjoy it, so I decided to make him a shirt similar to the E.T. movie poster.
In keeping with my “use it or lose it” resolution, I used a black t-shirt I picked up at Michael’s when it was on sale for $2.50 and some textile paints I purchased a while back but had yet to try out. I also used some adhesive vinyl to make a stencil using my Silhouette machine. (Had I known it would come out so well, I would’ve taken step-by-step photos!)
Making the stencil was easy: I found a picture of the E.T. poster online, copied it into Photoshop and enlarged it to the size I wanted. I then used the “magic wand” selection tool to select just the silhouette of Elliott and E.T., smoothed the edges a bit and filled it in with black. This step makes it easier to trace in the Silhouette software.
So what I ended up with was a vinyl stencil, with a big circle cut out for the moon and the letters “E.T.” cut out underneath, and a little “sticker” in the shape of Elliott and E.T. Once I had it stuck to the shirt, it took less than five minutes to paint. Really, all I did was dab white paint on the shirt, almost randomly, with a few dabs of blue added at the end. The way the black shirt shows through really made it look like the surface of the moon! It was so easy I’m tempted to make another one for myself.
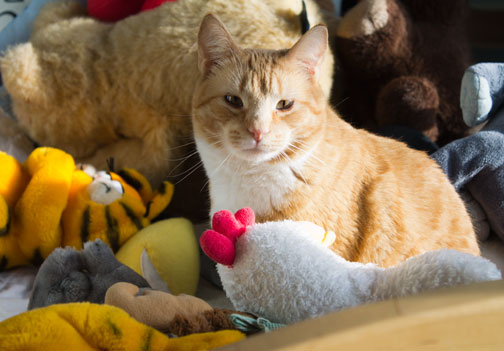
And here’s a silly picture of our cat Marmalade. The morning after we watched the movie, I happened to throw all of Parker’s stuffed animals on his bed so I could vacuum, and Marmalade jumped up in the middle. It reminded me a bit of the scene from the movie when E.T. is hiding among all the toys and stuffed animals!